
Custom metal labels and embellishing machines are invaluable tools for enhancing your specialty’s level of individuality and distinctiveness. Self-improvement projects are a creative way for people to build unique, personalized creations that stand out from other people’s creations. An embossing machine combined with 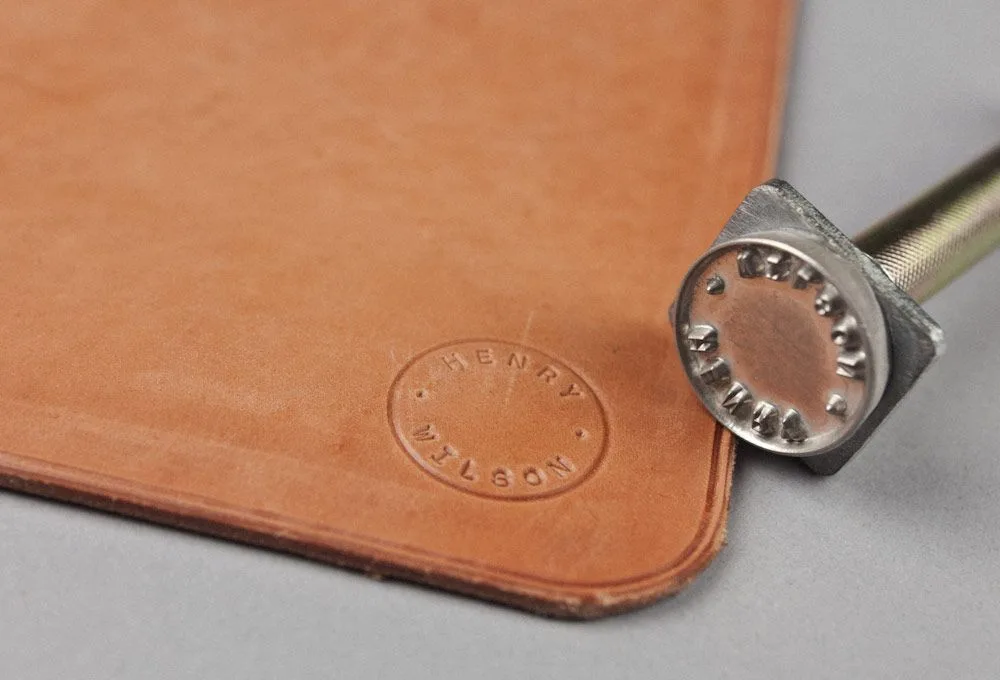 allows you to add raised surfaces, intricate designs, and customized messages to various activities. so, let’s learn more about them!
How To Do Metal Embossing
Material Needed
- Sturdy cardstock or thin chipboard.
- Sandpaper
- Scissors
- Foil tape, and oil (to remove the adhesive buildup off them afterward).
- Few different colored inks, such as copper or gold
- Craft knife
- Metal ruler
- Cutting mat
- your preferred embossing folders
- Die cutting/embossing machine
- Paper towels, wipes, or rags
- Tool to press two surfaces together
- Black craft paint, water, and a small container to hold the paint
- Strong glue
Steps For Strap Process
- Cut cardboard strips to the necessary width for the strapping process.
- Once you’ve cut out all the strips you desire, gently wrap each strip in tape, like you would a gift, by keeping the cardstock in the middle below. To fully wrap the cardstock strip, fold the tape over both of its long sides. Get rid of any extra tape.
- To achieve adequate adherence between the cardstock and tape, gently but firmly smooth over the top of each strip with your spatula.
- Decide which embossing folders to use.
- Lightly sand the surfaces—not much, but enough to reduce the bright glare of all that aluminum and prepare them for the upcoming black wash.
- With a ragged brush and a slightly wet mixture of your black craft paint, cover your straps liberally.
- After the paint has had time to dry, gently wipe it away until you are satisfied with the result. You want a metallic surface that is somewhat worn yet still looks good.
- Grab your applicator and alcohol inks, then stomp all over the surfaces. If you want to mimic the tones of copper or gold, don’t forget to add a little metallic Mixative.
Steps For Sheet Process
- Carefully apply tape strips to a full sheet of cardstock. Although it can be challenging to avoid gaps or overlaps, it is what we aim to do.
- Trim the sheets to suit your embossing folder after trimming off any extra tape. So that you don’t forget and become irate the next time you need to cut anything, clean the crud off your cutting tool with baby oil.
- Now emboss the sheet and lightly sand it.
- Add black paint; remove with water or a rag
- Alcohol ink tinting.
- Cut your stunning faux metal sheets into the shape needed for your project.
- Attach your tiny beauties with glue, and then use your spatula to gently but firmly press them into the project’s surface while being cautious not to damage the embossing.
- Use ink or paint to touch up the finish of your precious metal object.
How to Emboss in Any Color of Ink
Materials
- Card stock
- choosing an embossing folder
- Embossing machine
- Ink Pad
- Stamps
instructions
- Start by applying pressure to the prepared card base or another place you want to emboss with the DIY embossing buddy.
- Select a stamp to apply.
- Start with applying ink on your stamp. Not yet, stamp.
- Stamp over the ready surface.
- Then, stamp again in your preferred color.
- After that, cover with clear embossing powder. To remove any surplus powder, tap.
- To heat-set the stamped area, use the heat tool.
- You have it now! a gorgeous card with heat embossing in the color of your choice!
Best Embossing Machine
-
Sizzix Big Shot Express
It is the best embossing machine in terms of value. With the push of a button, you can easily produce your cards, invitations, scrapbook pages, home décor, and more with this ground-breaking tool that employs an electric motor rather than a crank. Additionally, it features built-in overload protection, uses less power, and is safer and more efficient. This machine is ideal for die-cutting and embossing a variety of materials.
-
Gemini Junior
On the move yet unwilling to forego creativity? Your new best buddy is the Gemini Junior, especially if you wish to emboss metal. Thanks to its quick and effective electric motor, this low-profile, space-saving die-cutting machine cuts and embosses in just 10 seconds.
Edge-to-edge cutting of materials up to 6″ x 9″ in dimension is possible with this device, which uses a greater pressure than typical die-cutting machines. For complex dies-cutting on heavyweight cardboard, vinyl, foil, and fabric, it is the perfect tool.
A convenient 11-piece die-cutting and embossing set are also included with the Gemini Junior.
Conclusion
Add a touch of creativity to your project with the techniques mentioned above! For more information related to embossing Visit Here To Related Post.